 Quick Reference — To reconcile and integrate data from external documents
When you receive or import a summary of care record or Patient Portal document into a patient chart, athenaOne provides visual prompts to reconcile data in the relevant chart sections. An orange alert bar appears on the left side of the history tab if data is available to reconcile.

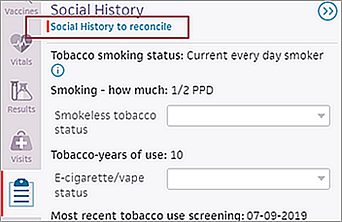
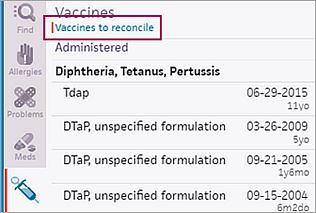
The orange alert bar also appears next to the specific history section and next to the link to the data reconciliation tool.
For imported summary of care records, athenaOne provides visual prompts to reconcile data in the Allergies, Medications, Problems, and Vaccines sections. To view information in other sections, open the document itself.
- Display the patient chart and locate the sections marked with an orange bar.
Note: You can also access the Data Reconciliation item in the Intake checklist. - Click a chart tab — for example, Meds or Vaccines — and click the reconcile link at the top of the tab.
The Data Reconciliation tab opens. - Expand the sections and review the items.
Note: You do not need to reconcile items from an incoming document that match corresponding items already in the chart or items that are only in the chart (these items appear in the data reconciliation document for your information only). For more information, see Items that appear in the data reconciliation document. - Resolve the Conflict items. Items marked with Conflict indicate that the item exists in both the chart and the incoming document, but the information is different.
- To keep the chart information, click the item on the left.
- To update the chart to reflect the information in the incoming document, click the item on the right.
- Resolve the Incoming Only items. Items marked with Incoming Only indicate that the item exists in the incoming document but not in the chart.
- To discard the item in the incoming document, click the item on the left.
- To add the item to the chart, click the item on the right.
- Resolve the Related Items. Items marked with Related Items exist in both the chart and the incoming document. They appear related, but they may or may not refer to the same event (for example, a vaccine "administered in 2019" and the same vaccine "administered on January 1, 2019"). You may need to reconcile these items.
- To keep the item in the chart and discard the item in the incoming document, click the item on the left.
- To overwrite the item in the chart with the item in the incoming document, click the item on the right.
- To keep the item in the chart and add the item in the incoming document to the chart, click both items.
- As you work through the items that need reconciliation, periodically click Save Progress at the top of the page. This action saves the selections that you have made up to that point, allowing you to navigate away from the Reconciliation tab without losing your work.
Note: Items that have a note field in athenaOne also have an editable note field on the Data Reconciliation tab. Edit the note only in the item that you select to keep (the chart data or the incoming document, not both). If you edit the note in the item that you then discard, the edited note is discarded as well. - (Optional) After you complete one section, you can update the chart to reflect your selections in just that section. To do this, click Update Chart for that section. In the Chart Confirmation dialog box that appears, review the items that appear in that section, and click Confirm to update the chart.
Note: If you do not want to work through the other sections of the reconciliation document at this time, you can archive the reconciliation document and return to it later (see To dismiss a reconciliation task). - After you complete all sections, click Update Chart at the top of the page.
Note: You can click this button only after you make a selection for all items. - Review the items and click Confirm.
athenaOne updates the patient's chart based on your selections.
Note: The Last Edited date indicates when the data element (allergy, medication, hospital discharge medication, or problem) in the incoming transition of care or referral summary was last updated.